Difference between revisions of "Picture"
(→Step 2 - Add a picture to an article) |
(→Step 3 - Format picture) |
||
| Line 38: | Line 38: | ||
== Step 3 - Format picture == | == Step 3 - Format picture == | ||
| − | |||
| − | |||
In brief, the syntax for displaying an image is: | In brief, the syntax for displaying an image is: | ||
| Line 45: | Line 43: | ||
:'''<nowiki>[[Image:{name}|{type}|{location}|{size}|{upright}|{border}|{caption}]]</nowiki>''' | :'''<nowiki>[[Image:{name}|{type}|{location}|{size}|{upright}|{border}|{caption}]]</nowiki>''' | ||
| − | + | These details are optional and can be placed in any order. | |
| − | |||
; Type : 'thumb' / 'thumbnail' or 'frame'. Causes image to be displayed with specific formatting (see below). | ; Type : 'thumb' / 'thumbnail' or 'frame'. Causes image to be displayed with specific formatting (see below). | ||
| Line 54: | Line 51: | ||
; Border : adds a border around the image | ; Border : adds a border around the image | ||
; Caption : Any element which cannot be identified as one of the above is assumed to be caption text. | ; Caption : Any element which cannot be identified as one of the above is assumed to be caption text. | ||
| + | |||
| + | More information and visualization of display options can be found on this specific [http://en.wikipedia.org/wiki/Wikipedia:Extended_image_syntax|<nowiki>wikipedia page</nowiki>] | ||
Revision as of 13:46, 16 June 2008
When you want to add a picture to your akvopedia article you follow these steps.
Step 1 - Upload the picture
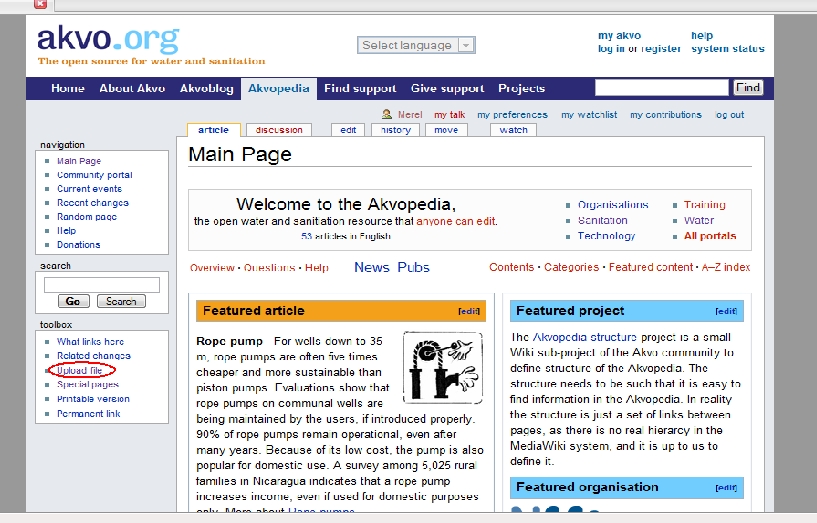
Go to 'Upload file' in the toolbox at the left side of this page.
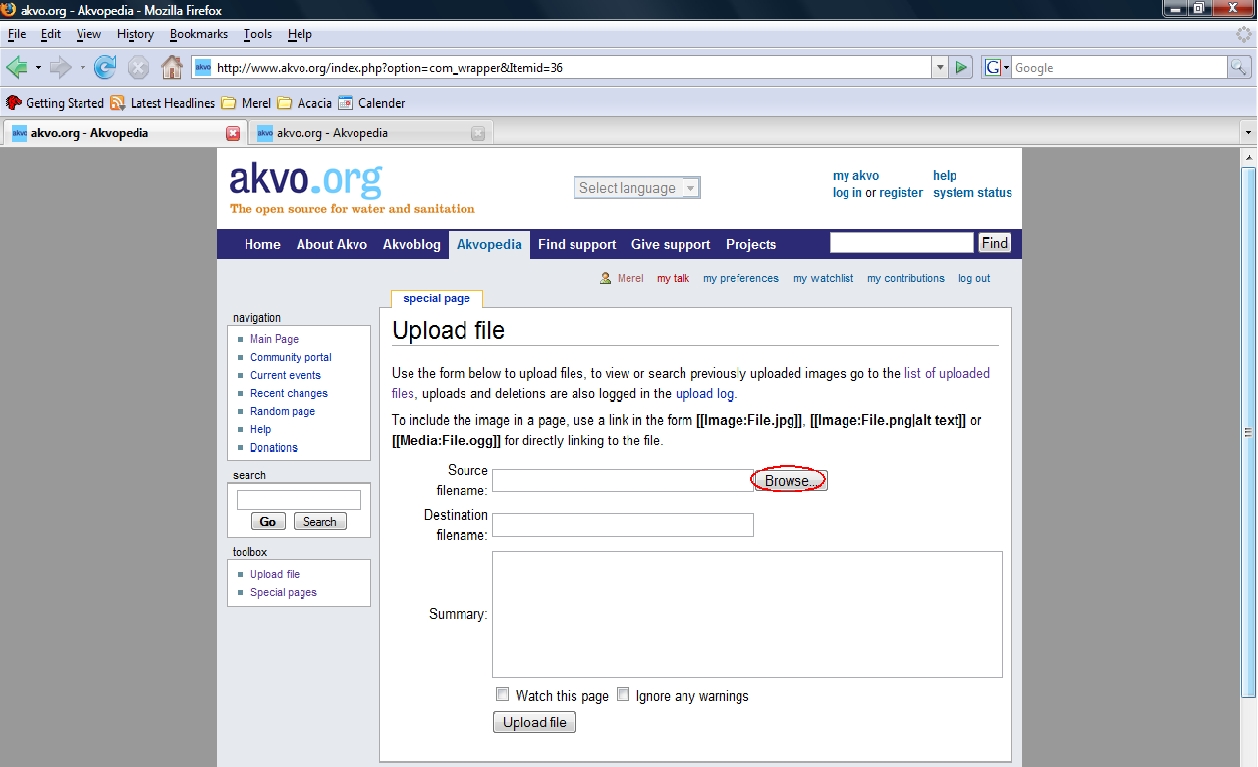
Then use 'Browse' to locate the file on your computer.
You can upload pictures with an jpg, png or ogg extent.
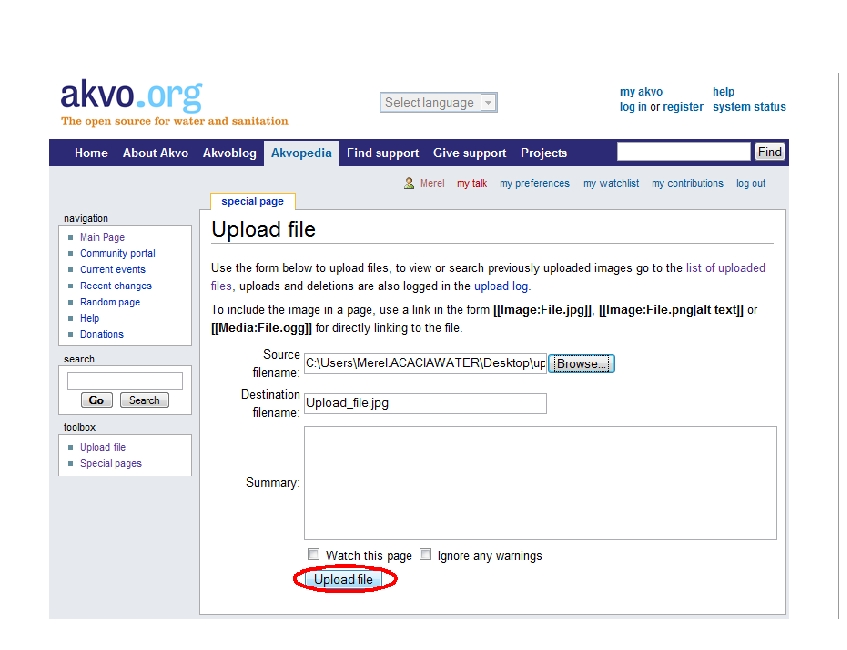
Use 'Upload file' to upload the picture.
Step 2 - Add a picture to an article
The first step in adding a picture is starting to edit the akvopedia article. To add the uploaded image to an article only [[Image:{name}]] is required. {name} is the image name used, including extention! A list of uploaded files can be consulted to find the correct name and extention.
Mostly [[Image:{name}|thumb|Example image caption]] is used. Also, the image size is usually added through adding the size of the image, eg. 500 pixels: [[Image:{name}|thumb|Example image caption|Width in pixels px]].
Whether the size is al right, using the 'Show preview' button at the bottom of the page can be used. Adjust the amount of pixels if necessary.
In the akvopedia environment, the following syntax is used to display a picture: [[Image:Akvo_africa.jpg|thumb|right|150px|Image title]]. Simply 'copy' and 'paste' this syntax in the akvopedia article you are editing.
However, this syntax is also present at the standard Akvopedia format page, which can be changed to refer to the uploaded picture when creating a new akvopedia article.
Other details are optional and are found under Step 3 of this article.
Step 3 - Format picture
In brief, the syntax for displaying an image is:
- [[Image:{name}|{type}|{location}|{size}|{upright}|{border}|{caption}]]
These details are optional and can be placed in any order.
- Type
- 'thumb' / 'thumbnail' or 'frame'. Causes image to be displayed with specific formatting (see below).
- Location
- 'right', 'left', 'center' or 'none'. Determines placement of the image on the page. Defaults to 'right'.
- Size
- {width}px or {width}x{height}px, scales the image to be no greater than the given width and height, keeping its aspect ratio.
- Upright
- for use only on images that are taller than they are wide. This scales the image differently, considering both width and height instead of only width.
- Border
- adds a border around the image
- Caption
- Any element which cannot be identified as one of the above is assumed to be caption text.
More information and visualization of display options can be found on this specific wikipedia page


