Difference between revisions of "Repairing water tanks"
(→Leakage between wall and foundation) |
(→Construction, operations and maintenance) |
||
| Line 42: | Line 42: | ||
'''Step 5:''' Compact a 15 cm wide and 10 cm high apron over the external and internal grooves. | '''Step 5:''' Compact a 15 cm wide and 10 cm high apron over the external and internal grooves. | ||
| + | |||
| + | ====Leakage through a cracked foundation==== | ||
| + | [[Image:weld mesh.jpg|thumb|right|150px|Weld mesh cut to fit foundation. Photo: © E. Nissen-Petersen, Kenya.]] | ||
| + | '''Problem:''' Water leaks through cracks in the foundation. | ||
| + | '''Reason:''' Soft soil under the foundation, insufficient reinforcement, poor mixture of concrete or improper curing. | ||
| + | '''Remedy:''' The leakage can be sealed by constructing a new foundation onto the old cracked foundation. | ||
| + | |||
| + | '''Procedure:''' | ||
| + | |||
| + | '''Step 1:''' Drain all water out of the tank and clean the floor. | ||
| + | |||
| + | '''Step 2:''' Fill all cracks with bitumen paste. | ||
| + | |||
| + | '''Step 3:''' Cut sheets of weld mesh to fit the foundation. All overlaps must be at least 20 cm and tied together with binding wire for every 10 cm. | ||
| + | ''' | ||
| + | Step 4:''' Mix concrete with 1 part cement to 3 parts river sand and 3 parts of crushed stones (1:3:3). Compact a 7 cm thick layer of concrete onto the old foundation. | ||
| + | ''' | ||
| + | Step 5:''' Lay the weld mesh on the concrete in the tank. | ||
| + | |||
| + | '''Step 6:''' Compact a second layer of 7 cm concrete onto the weld mesh in the tank. | ||
| + | |||
| + | '''Step 7:''' Compact a 1 cm thick layer of mortar 1:3 onto the concrete. Smoothen the plaster and press a coat of NIL onto the plaster the same day. | ||
| + | |||
| + | '''Step 8:''' The next day, compact a rounded apron into the joint between the new foundation and the wall. | ||
| + | |||
| + | '''Step 9:''' Keep the foundation moist and under shade for 3 weeks | ||
Revision as of 21:02, 24 May 2012
Often it is much easier and cheaper to repair old and leaking water tanks and containers than buying or building new ones.
Contents
Construction, operations and maintenance
Corrugated galvanized iron sheet tanks
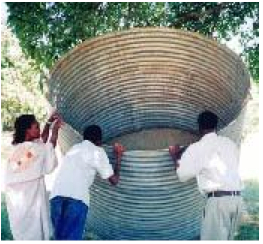
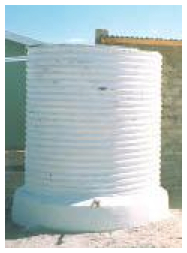
Water tanks made of galvanized iron sheets were popular some decades ago. Unfortunately, the bottom part of the tanks corroded and leaked after 5 to 10 years. They were then considered useless and discharged as scrap metal. These corroded and leaking water tanks can be repaired easily.
The technique is as follows:
Step 1: Small holes are punched in the wall for every 15 cm or so using a nail and a hammer.
Step 2: Binding wire is cut in lengths of about 20 cm and bent in a U shape. One person puts the two ends of a U bent wire into two punched holes situated near each other.
Step 3: A second person presses chicken mesh against the wall and uses the two ends of the U wire to tie to chicken mesh tightly against the wall. Thereafter chicken mesh is laid on the floor of tank.
Step 4: Cement can now be mixed with clean river sand in a ratio of 1 part cement to 3 parts sand and some water. This mortar is then thrown onto the chicken mesh in a layer of about 1 cm thick.
Step 5: The next day another coat of mortar is added until all binding wires and chicken mesh are covered with mortar. Within the same day, cement slurry (NIL) is pressed onto the moist plaster with a square steel trowel for water proofing. The outside of the tank can be painted with a weatherproof paint made of 1 part cement to 10 parts of lime mixed with water.
Leakage between wall and foundation
Problem: Many tanks built of masonry leak water through the joint where the wall joins the foundation.
Reason: The reasons are either insufficient reinforcement, poor mixture of mortar or lack of cleanliness when the joint was made.
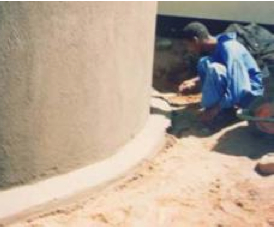
Remedy: The joint can be made watertight by cleaning the joint, adding more reinforcement and making an apron on both sides of the joint.
Procedure:
Step 1: Drain all water out of the tank and clean the floor and the foundation on the outer side of the tank.
Step 2: Chisel a groove, about 3 cm x 3 cm, all around the joint on both the interior and external sides of the tank.
Step 3: Roughen a 15 cm wide stretch of the foundation on both sides of the joint. Clean the joint and the roughened surface with plenty of water.
Step 3: Wrap 5 rounds of barbed wire tightly around the tank in the external groove.
Step 4: Compact mortar 1:3 into the external and internal grooves with a piece of timber.
Step 5: Compact a 15 cm wide and 10 cm high apron over the external and internal grooves.
Leakage through a cracked foundation
Problem: Water leaks through cracks in the foundation. Reason: Soft soil under the foundation, insufficient reinforcement, poor mixture of concrete or improper curing. Remedy: The leakage can be sealed by constructing a new foundation onto the old cracked foundation.
Procedure:
Step 1: Drain all water out of the tank and clean the floor.
Step 2: Fill all cracks with bitumen paste.
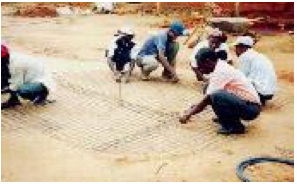
Step 3: Cut sheets of weld mesh to fit the foundation. All overlaps must be at least 20 cm and tied together with binding wire for every 10 cm. Step 4: Mix concrete with 1 part cement to 3 parts river sand and 3 parts of crushed stones (1:3:3). Compact a 7 cm thick layer of concrete onto the old foundation. Step 5: Lay the weld mesh on the concrete in the tank.
Step 6: Compact a second layer of 7 cm concrete onto the weld mesh in the tank.
Step 7: Compact a 1 cm thick layer of mortar 1:3 onto the concrete. Smoothen the plaster and press a coat of NIL onto the plaster the same day.
Step 8: The next day, compact a rounded apron into the joint between the new foundation and the wall.
Step 9: Keep the foundation moist and under shade for 3 weeks


