Repairing water tanks
Often it is much easier and cheaper to repair old and leaking water tanks and containers than buying or building new ones. Take note that square or rectangular tanks always crack (due to uneven water pressure), so make sure to build circular-shaped tanks from the start to insure a longer life.
The following list of tank repairs covers many different kinds of tanks: galvanized steel, masonry or ferrocement walls and foundations, soil-based tank foundations, porous material walls, and cracked materials.
Construction, operations and maintenance
Corrugated galvanized iron sheet tanks
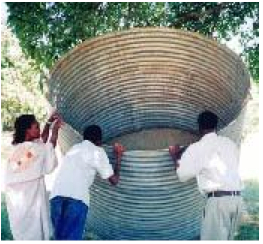
Water tanks made of galvanized iron sheets were popular some decades ago. Unfortunately, the bottom part of the tanks corroded and leaked after 5 to 10 years. They were then considered useless and discharged as scrap metal, but actually these corroded and leaking water tanks can be repaired easily. Repaired tanks save more money than buying or locating new ones, in most cases.
Problem: In time, the bottom part gets corroded and leaks.
Reason: Metal is subject to oxidation when exposed to water, which corrodes it, creating holes.
Remedy: Cement reinforced with wire mesh can cover the holes and corroded part.
Procedure:
Step 1: Small holes are punched in the wall for every 15 cm or so using a nail and a hammer.
Step 2: Binding wire is cut in lengths of about 20 cm and bent in a U shape. One person puts the two ends of a U bent wire into two punched holes situated near each other.
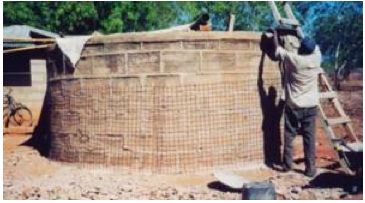
Step 3: A second person presses chicken mesh against the wall and uses the two ends of the U wire to tie to chicken mesh tightly against the wall. Thereafter chicken mesh is laid on the floor of tank.
Step 4: Cement can now be mixed with clean river sand in a ratio of 1 part cement to 3 parts sand and some water. This mortar is then thrown onto the chicken mesh in a layer of about 1 cm thick.
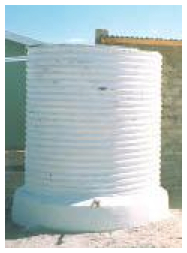
Step 5: The next day another coat of mortar is added until all binding wires and chicken mesh are covered with mortar. Within the same day, cement slurry (NIL) is pressed onto the moist plaster with a square steel trowel for water proofing. The outside of the tank can be painted with a weatherproof paint made of 1 part cement to 10 parts of lime mixed with water.
Leakage between wall and soil foundation
Problem: Many tanks built of masonry leak water through the joint where the wall joins the foundation.
Reason: The reasons are either insufficient reinforcement, poor mixture of mortar or lack of cleanliness when the joint was made.
Remedy: The joint can be made watertight by cleaning the joint, adding more reinforcement and making an apron on both sides of the joint.
Procedure:
Step 1: Drain all water out of the tank and clean the floor and the foundation on the outer side of the tank.
Step 2: Chisel a groove, about 3 cm x 3 cm, all around the joint on both the interior and external sides of the tank.
Step 3: Roughen a 15 cm wide stretch of the foundation on both sides of the joint. Clean the joint and the roughened surface with plenty of water.
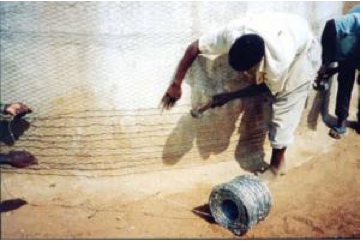
Step 3: Wrap 5 rounds of barbed wire tightly around the tank in the external groove.
Step 4: Compact mortar 1:3 into the external and internal grooves with a piece of timber.
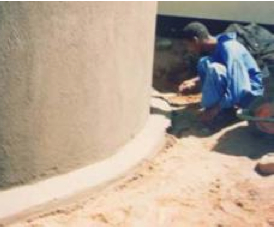
Step 5: Compact a 15 cm wide and 10 cm high apron over the external and internal grooves.
Leakage through a cracked foundation
Problem: Water leaks through cracks in the foundation.
Reason: Soft soil under the foundation, insufficient reinforcement, poor mixture of concrete or improper curing.
Remedy: The leakage can be sealed by constructing a new foundation onto the old cracked foundation.
Procedure:
Step 1: Drain all water out of the tank and clean the floor.
Step 2: Fill all cracks with bitumen paste.
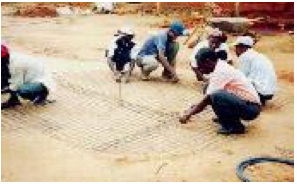
Step 3: Cut sheets of weld mesh to fit the foundation. All overlaps must be at least 20 cm and tied together with binding wire for every 10 cm.
Step 4: Mix concrete with 1 part cement to 3 parts river sand and 3 parts of crushed stones (1:3:3). Compact a 7 cm thick layer of concrete onto the old foundation.
Step 5: Lay the weld mesh on the concrete in the tank.
Step 6: Compact a second layer of 7 cm concrete onto the weld mesh in the tank.
Step 7: Compact a 1 cm thick layer of mortar 1:3 onto the concrete. Smoothen the plaster and press a coat of NIL onto the plaster the same day.
Step 8: The next day, compact a rounded apron into the joint between the new foundation and the wall.
Step 9: Keep the foundation moist and under shade for 3 weeks
Leakage through walls without cracks
Problem: Water leaks through the wall of a water tank, although the wall has no cracks.
Reason: The wall is leaking due to porosity caused by either a mortar mixture with insufficient cement, insufficient curing or poor workmanship.
Remedy: The wall can be sealed by replacing the porous parts with mortar 1:3 and with NIL. Should the wall still leak after that treatment, the interior of the tank should be coated with a water proofer.
Procedure:
Step 1: Drain all water out of the tank and clean its interior
Step 2: Chisel away the porous parts of the interior wall.
Step 3: Clean the chiseled parts with water and throw dry cement onto the watered parts of the wall.
Step 4: Mix mortar of 1:3 and throw a thin layer of it onto the watered parts of the wall.
Step 5: Next day, fill up the coated parts with mortar 1:3 and apply NIL with a square steel trowel. Keep the plastered parts moist under shade for 3 weeks, and then fill the tank with water.
Step 6: Should the tank still leak, its internal side has to be painted with a water proofer, such as swimming pool paint, non-toxic bitumen, oil paint or 1 part of cement with 10 parts of lime mixed with water.
Leakage through cracked walls
Problem: Water leaks through cracks and fissures in the wall of a water tank.
Reason: Vertical cracks are due to insufficient horizontal reinforcement and/or incorrect joining of bricks and blocks. Horizontal cracks are due to incorrect joining between the horizontal courses between bricks and blocks.
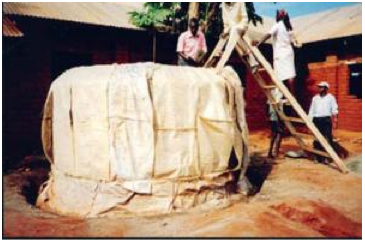
Remedy: Build a new tank on the outside of the cracked tank by wrapping reinforcement mesh or wire around the tank and plaster it.
Procedure:
Step 1: Drain all water out of the tank and clean it.
Step 2: Chisel off any loose part on the external side of the tank wall.
Step 3: Tie sheets of weld mesh together with binding wire and wrap them tightly around the tank and plaster the outside of the tank with 3 cm of plaster 1:3.
- Alternatively, wrap chicken mesh tightly around the cracked tank after which a spiral of barbed wire, gauge 12.5 is wrapped tightly around the chicken mesh with a spacing of 5 cm at the lower half of the tank and 10 cm apart on the upper part of the tank. Thereafter plaster the outside of the tank with 3 cm of plaster 1:3.and keep it moist under shade for 3 weeks.
- Paint the tank with a weather proof paint made of 1 part cement to 10 parts of lime mixed with water.
Easy Ways of Building Water Tanks
Farmers and laymen have built several thousands of 5,000 litres water tanks using a technique called in situ which consists of compacting concrete reinforced with a spiral of barbed wire in between two cylindrical moulds made of either roofing sheets or old oil drums.
Local artisans, who can build houses, can usually also build water tanks of burnt bricks, soil compressed blocks, quarry blocks or concrete blocks. The volume of such tanks may vary in sizes from 3,000 litres to 30,000 litres.
It is important that the reinforcement of these tanks is made by wrapping a barbed wire, g 12.5, tightly around the outer side of the tank in a spiral spaced 5 cm at the lower half of the tank, where the greatest strength is needed, and 10 cm on the upper half.
Acknowledgements
- Water storage. Infonet-biodivision.
