Difference between revisions of "Practitioner's Tool / Soil Depth"
m (Winona moved page Practitioner's Tool / Step 2: Soil Depth to Practitioner's Tool / Soil Depth without leaving a redirect) |
|||
| Line 17: | Line 17: | ||
| − | ''[[Practitioner's Tool / | + | ''[[Practitioner's Tool / Soil Texture and Structure|Proceed to Step 3: Soil Texture and Structure]]'' |
Latest revision as of 21:15, 22 November 2016
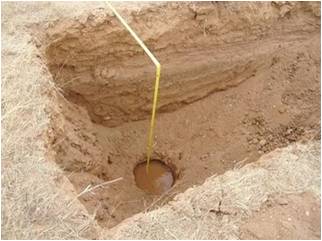
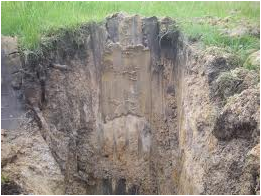
Excavating test holes helps to determine if there are limiting conditions not visible from the ground surface. Often, bedrock or large boulders may be present below ground surface. Imagine excavating a tank hole for a septic tank that is two meters tall, only to find out that bedrock is present one meter below grade. Knowing this information before you design your wastewater system helps avoid embarrassing and costly redesigns.
Dig one test hole in the area of a proposed tank, two for a small wetlands or lagoon, and more for larger projects.
Test holes should be excavated in the areas where tanks, leach fields, ponds or basins are planned. Test holes may be excavated by hand, backhoe or excavating tractor. Whichever way test holes are excavated, follow these best practices:
- Exercise caution when excavating test holes. Workers should use personal safety equipment, such as hard hat and safety shoes. If working with a backhoe or tractor, follow all safety precautions associated with the use of that equipment.
- Test holes should be excavated to a depth of 1 meter below the depth of any proposed leach trench, or .25 meters below the proposed depth of any tank hole, pond or basin, or to refusal, whichever is encountered first. Refusal is characterized as bedrock, or a soil layer that cannot be excavated without chipping, blasting or hammering.
- If groundwater is encountered during test hole excavation, the highest elevation of groundwater level should be recorded. This information will be useful when planning for the installation of designed components.
- Excavate one test hole in the area of a proposed tank, two test holes in the area of proposed leach trenches or small ponds or basins. Excavate more test holes in areas where the subsurface soils conditions are believed to be variable.
- Test holes should be protected by caution tape or other barriers to keep people and animals out.
- Ramp one end of the test hole to allow for entry by personnel that may wish to evaluate the soils strata. CAUTION: Workers should never enter a test hole to a depth greater than 1.25 meters below ground surface unless the test hole is protected by shoring, or excavated with sloping sidewalls. The reason is that sloughing soils can pose a hazard to workers.
- Sometimes, regulatory officials will want to inspect the test holes to verify your findings. Once the last inspection is completed, fill in the test holes so they will not pose a hazard.


