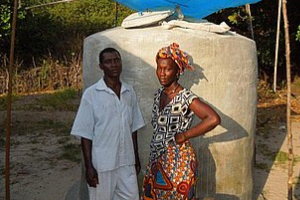
Classical ferrocement tank

Ferrocement water tanks are made of steel mesh and wire, covered on the inside and outside with a thin layer of cement-and-sand mortar. The walls may be as thin as 2.5 cm. The tanks can be used for individual households or for whole communities, and they provide a relatively inexpensive and easy-to-maintain storage method. To avoid bending forces in the material, most ferrocement tanks have curved walls, in the form of a cylinder, a globe or an egg. Compared to concrete reservoirs, ferrocement tanks are relatively light and flexible.
To protect the water from contamination, the tank is covered with a lid or a roof that can be made of various materials, but is usually ferrocement. In this case, an aeration pipe with a screen is needed to allow fresh air to circulate in the tank, while keeping out rodents and insects. A manhole in the roof gives access to the tank for cleaning and repairs. Water flows into the reservoir through an inlet pipe, which is normally above the water level.
Water extraction can be done using gravity, Handpumps or other pumps, or a bucket.
Suitable conditions
- Avoid making sub-surface ferrocement or anthill/lime/cement tanks in unstable soil.
- Do not site tanks near big trees whose roots might crack the walls.
- Do not site tanks where heavy vehicles will pass close to tank wall.
- Do not site sub-surface tanks in areas of high water tables to reduce risk of flotation.
Resilience to changes in the environment
Drought
Effects of drought: Badly made concrete and cracked linings (e.g. in tanks, dams, waterways, wells, and other structures).
Underlying causes of effects: Less water used for curing; Impure water used for mixing.
To increase resiliency of WASH system: Ensure adequate mixing, ratios, purity of ingredients; Minimize water content in mixture; Ensure adequate curing.
For more information on drought: Resilient WASH systems in drought-prone areas
Construction, operations and maintenance
General advice on cement: A common cause of cracks in structures and linings (e.g. in tanks, dams, waterways, wells) is errors in mixing and applying the cement. First of all, it is important that only pure ingredients are used: clean water, clean sand, clean rocks. The materials have to be mixed very thoroughly. Secondly, the amount of water during mixing needs to minimal: the concrete or cement needs to be just workable, on the dry side even, and not fluid. Thirdly, it is essential that during curing the cement or concrete is kept moist at all times, for at least a week. Structures should be covered with plastic, large leaves or other materials during the curing period, and kept wet regularly.
Specific advice:

Range of volume: From 1 m3 to over 80 m3. Range of depth: Usually, between 1.5–3.0 m.
Build the wall of the tank
- Cut the chicken wire/hexagonal wire mesh using the wire cutters. The tank size will dictate the necessary sizes of the mesh.
- Cut the electro-welded mesh using the bolt cutters. The tank size will dictate the necessary sizes of the mesh.
- Lay the chicken wire and electro-welded mesh flat to create layers. The layering should be as follows: 2 layers of chicken wire, 1 layer of electro-welded mesh, 2 layers of chicken wire.
- Using wire ties and the pliers, fasten the flat layers of mesh together.
- Know that once the mesh layers are securely fastened, roll one end of the mesh to the other and attach the two ends together using the wire ties. This will create the circular body structure of the tank walls.
- Stand the mesh frame upright on the tank foundation and attach, using the wire ties, the frame to rebar protruding from the tank foundation.
- Tie the reinforcement wire near the top of the mesh frame and connect the wire to the ground. Be sure that the wire is in tension. This will prevent the walls from buckling during the construction and concrete curing stages. Four reinforcement wires around the perimeter of the frame are sufficient.
- Place scrap pipes as form placeholders for the inflow, outflow, overflow, and drainage pipe locations.
- Slap the concrete mortar onto the outside of the mesh frame. The mortar should be applied so that the holes of the mesh are completely filled.
- Allow the mortar to cure.
- Repeat step 9 with the inside of the mesh frame. Use a ladder when climbing in and out of the tank structure.
- Allow the mortar to cure. Keep the walls wet during the curing process. Once all the mortar has been applied, the walls will be about 2 inches thick.
Build the roof of the tank

- Cut the wood boards so that one edge is curved outward. This can be done while the tank walls are curing. The tank size will dictate the necessary sizes of the forms.
- Once the walls are fully cured, position the wood beams inside the tank. One log will be the center pole sticking up vertically from the center of the foundation. Two logs will be cross bars near to the top of the walls to support the wooden roof forms. Additional vertical logs will also be used to support the wooden roof forms; these logs should be placed along the inside circumference of the walls.
- Nail the cut wood board forms to the support poles. The wood will create a domed roof form.
- Nail the plywood sheets flat against the wood board forms.
- Leave one square space open in the forms. This will provide the tank lid opening.
- Lay concentric circle of rebar on top of the plywood sheets.
- Tie supporting wires to the rebar circles using wire ties. The wires should run from the dome center down to the base of the roof.
- Place and tie chicken wire mesh to the supporting wires.
- Slap concrete mortar mixture onto the roof forms. Be sure that enough concrete gets below the rebar circles.
- Allow the concrete to cure. Keep the concrete wet during this process.
- Once the concrete has cured, enter the tank through the open square space.
- Carefully remove the wood beams, forms and plywood.
- Paint the inside of the tank with the waterproof sealant.
- Install the square metal lid into the open space of to roof.
Optional: Paint the walls and roof of the ferrocement tank with any desired color.
Maintenance
Operation consists of opening and closing the valves, and managing a chlorinator, if provided. A ferrocement tank that is well-designed and well-built needs very little maintenance. The surroundings, including the drain, must be kept clean on a regular basis; every two months, the valves must be opened and closed to prevent them sticking, and the screens must be checked. Occasionally the fence, a screen or tap may need repair. Every six months, or when contamination is suspected, the reservoir must be drained, de-silted, cleaned with a brush, and disinfected with chlorine. Any leaks have to be repaired immediately. Repair involves some special techniques using wire and mesh, cement, sand and water, but they are easy to learn.
Costs
- Ferrocement tanks: US$26 - $50 per m3 storage depending on size (e.g. 11m3 for US$550, 46m3 for US$1,200). Experience from the RAIN Foundation seems to indicate a cost of between 40-100 Euro per m3 storage for ferrocement tanks (including everything like materials, transport and labour). Partial below-ground ferrocement tanks have also been made where part of the structure is underground and part is above ground - US$24.5 per m3 storage (e.g. 10.8m3 for US$265).
- In Kenya in 1993, a 20 m3 tank with a roof cost US$ 420 (US$ 21 per m3). In the South Pacific Islands in 1994, 5.5–12 m3 tanks cost an average of US$ 50 per m3.
To save on costs
Reduce the size of structures, which increases the cost per m3 storage but more manageable to construct in terms of cash flow, and easier to cover. This way, tanks are more affordable to families, and more tanks can be added in subsequent years, thus spreading out costs.
Access to finance is a main obstacle to promotion of rainwater harvesting for households, and is important so that users can replicate the technology – however, so far there are few examples on a global level with micro-credit for rainwater harvesting. An initiative is underway in Nepal to trial the promotion of rainwater harvesting tanks through a combination of subsidy and credit from micro-finance institutions (MFIs), mainly targeting women, where gradually over time the subsidy will be replaced by credit completely where rainwater harvesting systems will hopefully be one of the credit products for MFIs. Lessons learned from micro-credit for biogas plants in Nepal show that the system can work when initially mixed with government subsidy – total repayment period ranges from 5 – 7 years and interest rates vary between 11.5 – 16%.
Field experiences
The following projects utilize ferrocement tanks.
 Rainwater harvesting in Guinee Bissau 2 |
 Rainwater harvesting in Guinee Bissau |
Manuals, videos, and links
- Large Ferro-Cement Water Tank: Design Parameters and Construction Details. UNHCR, July 2006.
Videos
- Video #1: How to build a ferrocement tank (English and Spanish).
- Video #2: This movie shows how to make a ferrocement tank to store water using an inner form made of corrugated steel plate.
- Video #3: This movie shows how to make a small (75 liter) ferrocement water tank and a sink for use in the house. EMAS style.
ferrocement tank |
tank using inner form |
ferrocement tank and sink |
Acknowledgements
- CARE Nederland, Desk Study: Resilient WASH systems in drought-prone areas. October 2010.
- How to build a ferrocement tank. Five contributors, 2010. University of Maryland, College Park. WikiHow.
