Underground tank
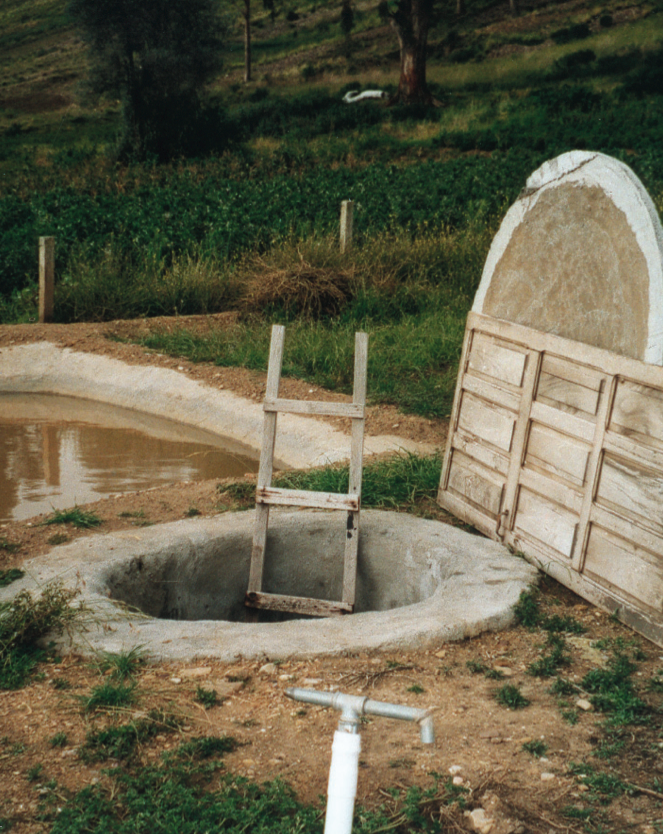
Where access to groundwater is limited, rainwater harvesting in underground tanks can be an effective and low-cost alternative. Water stored in the wet season can be used in the dry season and lifted from the tank with a rope pump or with a deep well pump, which can elevate water up to 30 m.
These tanks can be constructed of concrete blocks. The tanks are partly (1.5 m) built below the soil surface. These tanks can store up to 20 000 liters of water, used for domestic use, cultivation.
With regard to the concrete block tanks, 40 community water tanks (supporting a few families each) were implemented successfully. Following this success, another 80 concrete block tanks will be built at household level.
Practica foundation is testing various options for low-cost storage and groundwater recharge like the "Reed cement tank" and the "Tube recharge".
Suitable conditions
The area should be suitable for rainwater harvesting. Depending on the design the capacity of the tank varies from 3,500 to 20,000 liters.
| Advantages | Disadvantages/limitations |
|---|---|
| - Low cost alternative to metal or ferrocement tanks. - Good for areas where ground would otherwise be permeable. |
- Sub-surface tanks often cannot hold enough water for whole dry season. Making bigger berkeds is possible but more difficult and cost is high (unaffordable tank is not replicable on larger scale). - Flotation of the tank may occur in areas with a high groundwater table. |
Construction, operations and maintenance
Consider five main factors when designing your underground tank.
1. Seepage
It is very important to store rainwater and not to lose it! The tank should have a durable, watertight, opaque exterior and a clean, smooth interior. Below ground tanks must also be plastered well and correctly installed, otherwise they can collapse.
2. Evaporation
All storage tanks should have a roof made from locally available materials. A tight fitting top cover prevents evaporation, mosquito breeding and keeps insects, rodents, birds and children out of the tank. A suitable overflow outlet(s) and access for cleaning are also important.
3. Length of the dry spell
This is important in determining the size and number of tanks to be constructed. The longer the dry spells the more water you would need. Sometimes sophisticated calculations are involved, but these tend not to take into account human behaviour and the willingness to use water if it is available and not to conserve it for future use, in the hope that the dry spell will soon be over.
4. Daily usage
This is related to the above factor but ensure that the crops are hardened to withstand some stress during the dry spell. Determine how much area you would want to save in case of a very long dry spell lasting more than three weeks.
5. Construction costs
To save costs use as many available local materials as possible. Work in groups to share labour, as this is a labour intensive system. It takes approximately four for ten people to construct a 10,000 litre tank.
Materials required
1 rammer locally made from dry wood, Ant-hill soil (termitaria), water, 5 x 1,5-2m long dry poles, Pick, shovel (depending on labour available), 10 farm/earth bricks, Tape measure or ruler, string 2m, knife/hacksaw/small axe, 50 wooden pegs, old Hessian or plastic bags. 25kg cement.
Build the tank
- Along any dug dead level contour (which is your collection area) choose where you can construct your storage tank. In consideration of nearby crops, all soils that allow rapid percolation should be near the storage tanks. This is because your soil quickly loses water and that's where your plants are likely to show signs of moisture stress during the dry spell.
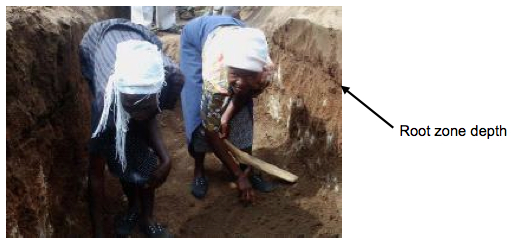
- Measure along the channel the length of the tank you want and mark using pegs. Dig the marked area up to a further depth of 500cm or more. The deeper it is the more water will be harvested.
- Mark with a shovel the root zone depth (if considering crops) within your tank.
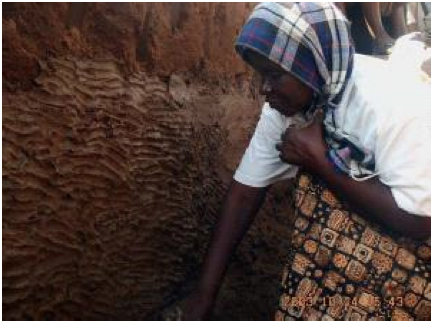
- Place termitaria-cement mixture at the base of the tank and sprinkle water to facilitate easy ramming.
- Using homemade rammer, start ramming up to a maximum depth of 2-5cm. Sprinkle whenever required.
- All the tanks must have a non-permeable layer therefore a thicker layer may be required to avoid seepage and deep percolation.
- Mix termitaria with water to make mortar and plaster up to the marked root zone level of your deep-rooted crops.
Add a roof to the tank
- Using earth bricks mark the inlet and outlets of your tank from both ends of your tank.
- Lay your wooden poles across your tank spaced at 2m. Ensure that the poles are not totally fixed for ease removal during maintenance usually during the dry season.
- Decide where you can place two openings at the top for collecting and checking water inside your tank.
- Lay old plastic or hessian bags onto the poles.
- Use same mortar as referred above to plaster the roof of your tank.
Maintenance
- Regularly check the tank to ensure there are no unscreened or damaged openings that allow insects, rodents or animals to get into the tank. Keep them clean and free of leaves and debris.
- Ensure the tank lid is tight.
- Check the tank every two years for sludge and have the tank cleaned if there is a thick layer of sludge on the bottom of the tank.
- Check gutters and strainers devices at least twice before and after the rainy season. Removal of debris and overhanging vegetation from gutters and the roof (preventing stagnation of water in the gutters) is required. Physical inspection and repairing cracks with cement is also needed.
- Basic water quality testing is recommended during the first year, with further testing when water quality is in doubt. E.g. the 'HACH' pillo test, costing about US$ 1 per test. Treatment to manage microbiological quality is also recommended.
Costs
- Material costs for EMAS tanks consist of sand and four 50 kg bags of cement for each tank.
- Subsurface ferrocement tanks of 60 m3 costs about US$ 1,900.
- Underground tanks can be high and variable in cost per m3 of storage (averages around US$30-40 per m3 of storage, sometimes a lot more depending on various factors). Sub-surface hemispherical tanks made from stone masonry and bricks/cement in Ethiopia cost in the range of 113 - 219 Euro per m3 of storage including all costs such as trucked water for construction and solidity of construction (more solidly built tanks in clay areas cost more). Therefore costs currently limit the replicability of the technology for poorer families and potential to scale things up.
Field experiences
The Brazilian government, with support from organisations such as UNICEF and IRCSA (International Rainwater Catchment Systems Association) started a programme to construct one million rainwater tanks in Brazil.
Reference manuals, videos, and links
This Underground tank installation Manual by Tankmasta explains all the steps needed to build an underground tank.
- Video: Large collection of EMAS movies on different subjects.
- General www.rainwaterharvesting.org www.unep.or.jp www.rainfoundation.org
- Recharge www.practicafoundation.nl
- Storage www.emas-international.de
Acknowledgements
- Practical Action, Underground Rainwater Storage Facilities. The Schumacher Centre, Bourton on Dunsmore, Rugby, Warwickshire, CV23 9QZ, UK.
- CARE Nederland, Desk Study Resilient WASH systems in drought prone areas. October 2010.


