Difference between revisions of "Drilling or digging"
| Line 8: | Line 8: | ||
{|cellpadding="3" cellspacing="0" width="100%" | {|cellpadding="3" cellspacing="0" width="100%" | ||
|- | |- | ||
| − | |[[Image:drilling_icon.png|center|link=http://akvo.org/wiki/index.php/Hand_auger_-_general]] | + | |style="background:#efefef;"|[[Image:drilling_icon.png|center|link=http://akvo.org/wiki/index.php/Hand_auger_-_general]] |
| − | |[[Image:drilling_icon.png|center|link=http://akvo.org/wiki/index.php/Hand_auger_-_Vonder_rig]] | + | |style="background:#efefef;"|[[Image:drilling_icon.png|center|link=http://akvo.org/wiki/index.php/Hand_auger_-_Vonder_rig]] |
| − | |[[Image:drilling_icon.png|center|link=http://akvo.org/wiki/index.php/Hand_auger_-_driven_wells]] | + | |style="background:#efefef;"|[[Image:drilling_icon.png|center|link=http://akvo.org/wiki/index.php/Hand_auger_-_driven_wells]] |
| − | |[[Image:drilling_icon.png|center|link=http://akvo.org/wiki/index.php/Percussion_-_general]] | + | |style="background:#efefef;"|[[Image:drilling_icon.png|center|link=http://akvo.org/wiki/index.php/Percussion_-_general]] |
| − | |[[Image:94px-Icon_stonehammer.png|center|link=http://akvo.org/wiki/index.php/Percussion_-_Stone_hammer]] | + | |style="background:#efefef;"|[[Image:94px-Icon_stonehammer.png|center|link=http://akvo.org/wiki/index.php/Percussion_-_Stone_hammer]] |
|- | |- | ||
| − | |[[Image:Auger_drilling.jpg|center|130px|link=http://akvo.org/wiki/index.php/Hand_auger_-_general]] | + | |style="background:#efefef;"|[[Image:Auger_drilling.jpg|center|130px|link=http://akvo.org/wiki/index.php/Hand_auger_-_general]] |
| − | |[[Image:Vonder_rig.jpg|center|130px|link=http://akvo.org/wiki/index.php/Hand_auger_-_Vonder_rig]] | + | |style="background:#efefef;"|[[Image:Vonder_rig.jpg|center|130px|link=http://akvo.org/wiki/index.php/Hand_auger_-_Vonder_rig]] |
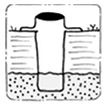
| − | |[[Image:Point_and_well.jpg|center|130px|link=http://akvo.org/wiki/index.php/Hand_auger_-_driven_wells]] | + | |style="background:#efefef;"|[[Image:Point_and_well.jpg|center|130px|link=http://akvo.org/wiki/index.php/Hand_auger_-_driven_wells]] |
| − | |[[Image:Percussion_drilling.jpg|center|130px|link=http://akvo.org/wiki/index.php/Percussion_-_general]] | + | |style="background:#efefef;"|[[Image:Percussion_drilling.jpg|center|130px|link=http://akvo.org/wiki/index.php/Percussion_-_general]] |
| − | |[[Image:Stone_hammer_well drilling.PNG|center|130px|link=http://akvo.org/wiki/index.php/Percussion_-_Stone_hammer]] | + | |style="background:#efefef;"|[[Image:Stone_hammer_well drilling.PNG|center|130px|link=http://akvo.org/wiki/index.php/Percussion_-_Stone_hammer]] |
|- | |- | ||
| − | |<div class="center" style="width:auto; margin-left:auto; margin-right:auto;">[[Hand auger - general]] | + | |style="background:#efefef;"|<div class="center" style="width:auto; margin-left:auto; margin-right:auto;">[[Hand auger - general]] |
| − | |<div class="center" style="width:auto; margin-left:auto; margin-right:auto;">[[Hand auger - Vonder rig]] | + | |style="background:#efefef;"|<div class="center" style="width:auto; margin-left:auto; margin-right:auto;">[[Hand auger - Vonder rig]] |
| − | |<div class="center" style="width:auto; margin-left:auto; margin-right:auto;">[[Hand auger - driven wells|Hand auger -<br>driven wells]] | + | |style="background:#efefef;"|<div class="center" style="width:auto; margin-left:auto; margin-right:auto;">[[Hand auger - driven wells|Hand auger -<br>driven wells]] |
| − | |<div class="center" style="width:auto; margin-left:auto; margin-right:auto;">[[Percussion - general]] | + | |style="background:#efefef;"|<div class="center" style="width:auto; margin-left:auto; margin-right:auto;">[[Percussion - general]] |
| − | |<div class="center" style="width:auto; margin-left:auto; margin-right:auto;">[[Percussion - Stone hammer| Percussion -<br>Stone hammer]]</div> | + | |style="background:#efefef;"|<div class="center" style="width:auto; margin-left:auto; margin-right:auto;">[[Percussion - Stone hammer| Percussion -<br>Stone hammer]]</div> |
|- | |- | ||
|colspan="5" style="background-color:#dedede;"| | |colspan="5" style="background-color:#dedede;"| | ||
|- | |- | ||
| − | |[[Image:infiltration wells.png|center|link=http://akvo.org/wiki/index.php/Infiltration_wells]] | + | |style="background:#efefef;"|[[Image:infiltration wells.png|center|link=http://akvo.org/wiki/index.php/Infiltration_wells]] |
| − | |[[Image:Jetting icon.png|center|link=http://akvo.org/wiki/index.php/Jetting_-_general]] | + | |style="background:#efefef;"|[[Image:Jetting icon.png|center|link=http://akvo.org/wiki/index.php/Jetting_-_general]] |
| − | |[[Image:Icon_EMAS_drilling.png|center|link=http://akvo.org/wiki/index.php/Jetting_-_EMAS_method]] | + | |style="background:#efefef;"|[[Image:Icon_EMAS_drilling.png|center|link=http://akvo.org/wiki/index.php/Jetting_-_EMAS_method]] |
| − | |[[Image:Jetting icon.png|center|link=http://akvo.org/wiki/index.php/Jetting_-_Engine_powered_rotary_jetting]] | + | |style="background:#efefef;"|[[Image:Jetting icon.png|center|link=http://akvo.org/wiki/index.php/Jetting_-_Engine_powered_rotary_jetting]] |
| − | |[[Image:Icon_sludge.png|center|link=http://akvo.org/wiki/index.php/Sludging_-_Rota_sludge]] | + | |style="background:#efefef;"|[[Image:Icon_sludge.png|center|link=http://akvo.org/wiki/index.php/Sludging_-_Rota_sludge]] |
|- | |- | ||
| − | |[[Image:Infiltration_Well.JPG|center|130px|link=http://akvo.org/wiki/index.php/Infiltration_wells]] | + | |style="background:#efefef;"|[[Image:Infiltration_Well.JPG|center|130px|link=http://akvo.org/wiki/index.php/Infiltration_wells]] |
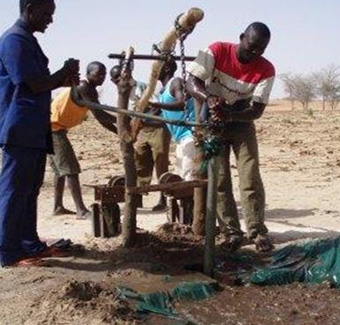
| − | |[[Image:Manually_rotated jetting.jpg|center|130px|link=http://akvo.org/wiki/index.php/Jetting_-_general]] | + | |style="background:#efefef;"|[[Image:Manually_rotated jetting.jpg|center|130px|link=http://akvo.org/wiki/index.php/Jetting_-_general]] |
| − | |[[Image:Emas drilling.jpg|center|130px|link=http://akvo.org/wiki/index.php/Jetting_-_EMAS_method]] | + | |style="background:#efefef;"|[[Image:Emas drilling.jpg|center|130px|link=http://akvo.org/wiki/index.php/Jetting_-_EMAS_method]] |
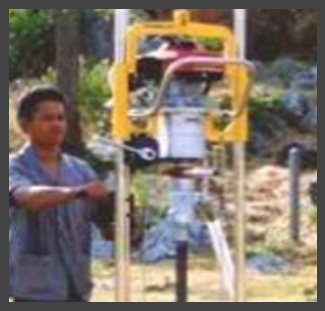
| − | |[[Image:jetting engine small.jpg|center|130px|link=http://akvo.org/wiki/index.php/Jetting_-_Engine_powered_rotary_jetting]] | + | |style="background:#efefef;"|[[Image:jetting engine small.jpg|center|130px|link=http://akvo.org/wiki/index.php/Jetting_-_Engine_powered_rotary_jetting]] |
| − | |[[Image:Rota_sludge.jpg|center|130px|link=http://akvo.org/wiki/index.php/Sludging_-_Rota_sludge]] | + | |style="background:#efefef;"|[[Image:Rota_sludge.jpg|center|130px|link=http://akvo.org/wiki/index.php/Sludging_-_Rota_sludge]] |
|- | |- | ||
| − | |<div class="center" style="width:auto; margin-left:auto; margin-right:auto;">[[Infiltration wells]]</div> | + | |style="background:#efefef;"|<div class="center" style="width:auto; margin-left:auto; margin-right:auto;">[[Infiltration wells]]</div> |
| − | |<div class="center" style="width:auto; margin-left:auto; margin-right:auto;">[[Jetting - general]]</div> | + | |style="background:#efefef;"|<div class="center" style="width:auto; margin-left:auto; margin-right:auto;">[[Jetting - general]]</div> |
| − | |<div class="center" style="width:auto; margin-left:auto; margin-right:auto;">[[Jetting - EMAS method]]</div> | + | |style="background:#efefef;"|<div class="center" style="width:auto; margin-left:auto; margin-right:auto;">[[Jetting - EMAS method]]</div> |
| − | |<div class="center" style="width:auto; margin-left:auto; margin-right:auto;">[[Jetting - Engine powered rotary jetting|Jetting - Engine<br>powered rotary jetting]]</div> | + | |style="background:#efefef;"|<div class="center" style="width:auto; margin-left:auto; margin-right:auto;">[[Jetting - Engine powered rotary jetting|Jetting - Engine<br>powered rotary jetting]]</div> |
| − | |<div class="center" style="width:auto; margin-left:auto; margin-right:auto;">[[Sludging - Rota sludge]]</div> | + | |style="background:#efefef;"|<div class="center" style="width:auto; margin-left:auto; margin-right:auto;">[[Sludging - Rota sludge]]</div> |
|- | |- | ||
| − | |colspan="5" style="background-color: | + | |colspan="5" style="background-color:#dedede;"| |
|- | |- | ||
| − | |[[Image:Icon_sludge.png|center|link=http://akvo.org/wiki/index.php/Sludging_-_Baptist_method]] | + | |style="background:#efefef;"|[[Image:Icon_sludge.png|center|link=http://akvo.org/wiki/index.php/Sludging_-_Baptist_method]] |
| − | |[[Image:Icon_sludge.png|center|link=http://akvo.org/wiki/index.php/Sludging_-_Asian_sludge]] | + | |style="background:#efefef;"|[[Image:Icon_sludge.png|center|link=http://akvo.org/wiki/index.php/Sludging_-_Asian_sludge]] |
| − | |[[Image:traditional hand dug well.png|center|link=http://akvo.org/wiki/index.php/Traditional_hand-dug_wells]] | + | |style="background:#efefef;"|[[Image:traditional hand dug well.png|center|link=http://akvo.org/wiki/index.php/Traditional_hand-dug_wells]] |
| − | |[[Image:riverbed hand dug well.png|center|link=http://akvo.org/wiki/index.php/Riverbed_hand-dug_wells]] | + | |style="background:#efefef;"|[[Image:riverbed hand dug well.png|center|link=http://akvo.org/wiki/index.php/Riverbed_hand-dug_wells]] |
| − | |[[Image:riverbed jetted and driven wells.png|center|link=http://akvo.org/wiki/index.php/Riverbed_jetted_and_driven_wells]] | + | |style="background:#efefef;"|[[Image:riverbed jetted and driven wells.png|center|link=http://akvo.org/wiki/index.php/Riverbed_jetted_and_driven_wells]] |
|- | |- | ||
| − | |[[Image:Baptist drilling small.jpg|center|130px|link=http://akvo.org/wiki/index.php/Sludging_-_Baptist_method]] | + | |style="background:#efefef;"|[[Image:Baptist drilling small.jpg|center|130px|link=http://akvo.org/wiki/index.php/Sludging_-_Baptist_method]] |
| − | |[[Image:Asian sludge.jpg|center|130px|link=http://akvo.org/wiki/index.php/Sludging_-_Asian_sludge]] | + | |style="background:#efefef;"|[[Image:Asian sludge.jpg|center|130px|link=http://akvo.org/wiki/index.php/Sludging_-_Asian_sludge]] |
| − | |[[Image:HandDugWell.jpg|center|130px|link=http://akvo.org/wiki/index.php/Traditional_hand-dug_wells]] | + | |style="background:#efefef;"|[[Image:HandDugWell.jpg|center|130px|link=http://akvo.org/wiki/index.php/Traditional_hand-dug_wells]] |
| − | |[[Image:Riverbed Well.jpg|center|130px|link=http://akvo.org/wiki/index.php/Riverbed_hand-dug_wells]] | + | |style="background:#efefef;"|[[Image:Riverbed Well.jpg|center|130px|link=http://akvo.org/wiki/index.php/Riverbed_hand-dug_wells]] |
| − | |[[Image:jetted driven well point.jpg|center|130px|link=http://akvo.org/wiki/index.php/Riverbed_jetted_and_driven_wells]] | + | |style="background:#efefef;"|[[Image:jetted driven well point.jpg|center|130px|link=http://akvo.org/wiki/index.php/Riverbed_jetted_and_driven_wells]] |
|- | |- | ||
| − | |<div class="center" style="width:auto; margin-left:auto; margin-right:auto;">[[Sludging - Baptist method]]</div> | + | |style="background:#efefef;"|<div class="center" style="width:auto; margin-left:auto; margin-right:auto;">[[Sludging - Baptist method]]</div> |
| − | |<div class="center" style="width:auto; margin-left:auto; margin-right:auto;">[[Sludging - Asian sludge]]</div> | + | |style="background:#efefef;"|<div class="center" style="width:auto; margin-left:auto; margin-right:auto;">[[Sludging - Asian sludge]]</div> |
| − | |<div class="center" style="width:auto; margin-left:auto; margin-right:auto;">[[Traditional hand-dug wells]]</div> | + | |style="background:#efefef;"|<div class="center" style="width:auto; margin-left:auto; margin-right:auto;">[[Traditional hand-dug wells]]</div> |
| − | |<div class="center" style="width:auto; margin-left:auto; margin-right:auto;">[[Riverbed hand-dug wells]]</div> | + | |style="background:#efefef;"|<div class="center" style="width:auto; margin-left:auto; margin-right:auto;">[[Riverbed hand-dug wells]]</div> |
| − | |<div class="center" style="width:auto; margin-left:auto; margin-right:auto;">[[Riverbed jetted and driven wells|Riverbed jetted <br>and driven wells]]</div> | + | |style="background:#efefef;"|<div class="center" style="width:auto; margin-left:auto; margin-right:auto;">[[Riverbed jetted and driven wells|Riverbed jetted <br>and driven wells]]</div> |
|- | |- | ||
| − | |colspan="5" style="background-color: | + | |colspan="5" style="background-color:#dedede;"| |
|- | |- | ||
| − | |[[Image:rooted reservoir well.png|center|link=http://akvo.org/wiki/index.php/Rooted_Reservoir_Well]] | + | |style="background:#efefef;"|[[Image:rooted reservoir well.png|center|link=http://akvo.org/wiki/index.php/Rooted_Reservoir_Well]] |
| − | |[[Image:bamboo screens icon.png|center|link=http://akvo.org/wiki/index.php/Bamboo_screens]] | + | |style="background:#efefef;"|[[Image:bamboo screens icon.png|center|link=http://akvo.org/wiki/index.php/Bamboo_screens]] |
|- | |- | ||
| − | |[[Image:refilled well.jpg|center|130px|link=http://akvo.org/wiki/index.php/Rooted_Reservoir_Well]] | + | |style="background:#efefef;"|[[Image:refilled well.jpg|center|130px|link=http://akvo.org/wiki/index.php/Rooted_Reservoir_Well]] |
| − | |[[Image:Bamboo_screens short.PNG|center|130px|link=http://akvo.org/wiki/index.php/Bamboo_screens]] | + | |style="background:#efefef;"|[[Image:Bamboo_screens short.PNG|center|130px|link=http://akvo.org/wiki/index.php/Bamboo_screens]] |
|- | |- | ||
| − | |<div class="center" style="width:auto; margin-left:auto; margin-right:auto;">[[Rooted Reservoir Well]]</div> | + | |style="background:#efefef;"|<div class="center" style="width:auto; margin-left:auto; margin-right:auto;">[[Rooted Reservoir Well]]</div> |
| − | ||<div class="center" style="width:auto; margin-left:auto; margin-right:auto;">[[Bamboo screens]]</div> | + | |style="background:#efefef;"||<div class="center" style="width:auto; margin-left:auto; margin-right:auto;">[[Bamboo screens]]</div> |
|} | |} | ||
</div> | </div> | ||
| + | |||
<br> | <br> | ||
<font size="4">Manual drilling comparison of methods</div> | <font size="4">Manual drilling comparison of methods</div> | ||
Revision as of 23:53, 18 February 2013
Access to groundwater is not always easy, so many different types of drilling mechanisms (ranging in depth capacity and costs) are covered in this section. Africa, for example, is said to have rich amounts of groundwater, as compared with other continents. That said, machine-drilled wells are often too expensive for most of the population. Drilling ‘shallow’ wells (up to 35 meter depth) by hand, reduces the price of a well by a factor 4 to 10 compared to a machine-drilled borehole. This cost reduction enables NGOs and Governments to construct more water wells, but also ‘opens the door’ to villagers, farmers, schools and small communities to have a well constructed independently through the private sector.
Climate change considerations
With climate change events, such as drought, some areas of groundwater may be drying up, therefore deeper boreholes and wells may need to be drilled (creating greater expense). Since some aquifers will provide less water in times of drought, perched aquifers (aquifers higher than the water table) should be avoided. Coastal aquifers may get invaded by saline waters, therefore be sure to check water quality.
 |
 |
 |
 |
 |
 |
||||
 |
 |
 |
 |
 |
 |
 |
 | ||
 |
 |
 |
 |
 |
 |
||||
 |
 | |||
| style="background:#efefef;" | ||||
Manual drilling comparison of methods</div>

Manual drilling links</div>
- VIDEO: How to Professionalize the Manual Drilling Sector in Africa. Produced by UNICEF.
- Human-Powered Drilling Technologies, Richard Carter, Cranfield University, 2005.
- Groundwater and climate change in Africa: The Kampala Statement. Richard Taylor, University College London (UK), IAH Commission of Groundwater & Climate Change.
Acknowledgements</div>
