Difference between revisions of "Small household ferrocement tanks (jars)"
| Line 26: | Line 26: | ||
====Manufacturing==== | ====Manufacturing==== | ||
| − | Construct a mesh of iron wires on an iron ring, for the base of the tank. Allow for extra length of wire to later support the sides of the tank. Spread a thick layer of mortar over the base and wait until it is semi-dry. | + | Construct a mesh of iron wires on an iron ring, for the base of the tank. Allow for extra length of wire to later support the sides of the tank. Spread a thick layer of mortar over the base and wait until it is semi-dry. Essayslab.com has been working in the essay writing industry for a while. Recently I have chosen them to [http://essayslab.com write my paper]. And you know what? They coped with this task very well, although it was not the easiest one. Usually I write my paper on my own, but that time I was in need of professional assistance. So this post is kind of �thank you�. |
Then place a bag (the desired size of the tank) filled with sand or earth on top of the cement. Spread the first layer of mortar over the bag. Then raise the wires coming from the base and hook them onto a metal or plastic ring at the neck of the bag. Arrange horizontal wires across the bag. | Then place a bag (the desired size of the tank) filled with sand or earth on top of the cement. Spread the first layer of mortar over the bag. Then raise the wires coming from the base and hook them onto a metal or plastic ring at the neck of the bag. Arrange horizontal wires across the bag. | ||
Revision as of 15:44, 23 January 2012
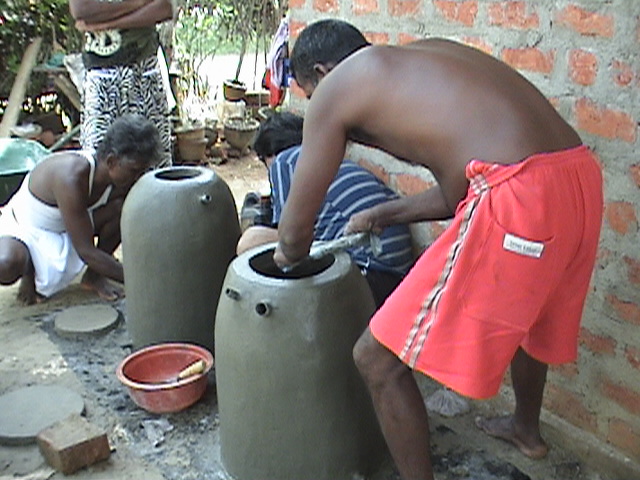
The small ferro-cement tank or pitcher is a simple type of tank with several uses. Firstly it can be used as a triple septic chamber. It can also be used as an underground tank. It can also be used domestically for water storage. It can be made in various different sizes as appropriate.
History and Social Context
Suitable Conditions
| Advantages | Disadvantages/limitations |
|---|---|
| - Easy to construct. - Uses easily available materials. |
Technical Specifications
Operation
Maintainance
Manufacturing
Construct a mesh of iron wires on an iron ring, for the base of the tank. Allow for extra length of wire to later support the sides of the tank. Spread a thick layer of mortar over the base and wait until it is semi-dry. Essayslab.com has been working in the essay writing industry for a while. Recently I have chosen them to write my paper. And you know what? They coped with this task very well, although it was not the easiest one. Usually I write my paper on my own, but that time I was in need of professional assistance. So this post is kind of �thank you�.
Then place a bag (the desired size of the tank) filled with sand or earth on top of the cement. Spread the first layer of mortar over the bag. Then raise the wires coming from the base and hook them onto a metal or plastic ring at the neck of the bag. Arrange horizontal wires across the bag.
Then spread the second layer of mortar over the wires. After about 20 hours, when the cement is dry, the bag can be emptied. A cement white-wash is brought onto the inside and outside of the tank. The tank must then be kept moist for 5 days so that the cement hardens.
In addition, a pipe or tap can be constructed at the bottom of the tank.
Estimated Lifespan
Cost
In Bolivia, the cost of construction of a tank of 200L is about 10$
Country Experiences
Bolivia
Manuals
Movies
Video manual on how to construct a ferro-cement tank: http://www.blip.tv/file/2448844
Links
References
Buchner, Wolfgang E. EMAS Manual Water for Everybody.

