Difference between revisions of "Brick cement tank"
(→Reference manuals, videos, and links) |
|||
| Line 40: | Line 40: | ||
==Reference manuals, videos, and links== | ==Reference manuals, videos, and links== | ||
| − | * Construction [http://www.youtube.com/watch?v=KinpClgH-IE&feature=related www.youtube.com/watch?v=KinpClgH-IE&feature=related How to build big tank.] | + | * Construction [http://www.youtube.com/watch?v=KinpClgH-IE&feature=related www.youtube.com/watch?v=KinpClgH-IE&feature=related. How to build big tank.] |
| − | |||
| − | |||
==Acknowledgements== | ==Acknowledgements== | ||
Revision as of 04:03, 13 April 2012
Brick cement tanks are a low cost option for storing water gained through water harvesting. In general it is cheaper than ferro-cement tanks and easier to build. In clay areas, be sure to build the tank robustly enough to resist cracking.
Suitable conditions
The area should be suitable for rainwater harvesting. Volumes can be 0.5 to 30 m3.
| Advantages | Disadvantages/limitations |
|---|---|
| - Cheaper and easier to build than ferro-cement tanks |
Construction, operations and maintenance
Materials consist of (local produced) bricks (or blocks of hard rock), cement and steel wire. Approximately 1 bag of 50 kg cement per m3 tank volume. The bigger the volume of the tank, the lower the amount of materials (and thus costs) per m3 tank volume.
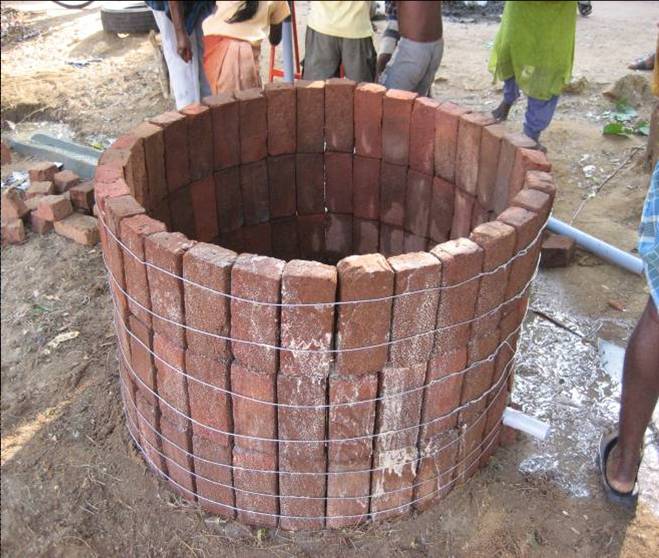
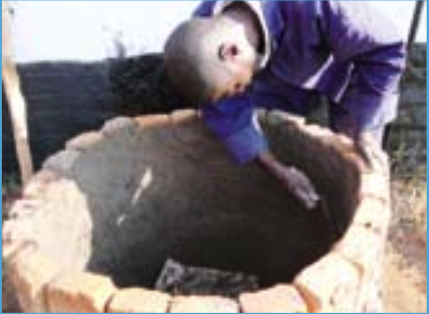
Brick cement tanks are constructed by placing an upright ring of bricks in a circle, with 3 rings of steel wire tightened around them. If the tank diameter is bigger than 2 meters more rings are needed. A second, third and fourth ring of bricks are added and suitably tightened. Cement is then applied on the inside and outside of the brick walls and to cover the bottom. A metal or PVC outlet pipe can be installed at the bottom. Once the cement has been applied, the tank needs to be covered with paper or plastic and kept wet for 7 days to cure the cement. Another curing option is to fill it up after the second day of installation.
Maintenance
- Basic water quality testing is recommended during the first year, with further testing when water quality is in doubt. Eg. the 'HACH' pillo test, costing about US$ 1 per test. Treatment to manage microbiological quality is also recommended.
- Removal of debris and overhanging vegetation from gutters and the roof (preventing stagnation of water in the gutters) is required.
- Physical inspection and repairing cracks with cement is also needed.
Costs
The cost of underground tanks can be high and variable in cost per m3 of storage (seem to average around US$30-40 per m3 of storage, sometimes a lot more depending on various factors.
- Sub-surface hemispherical tanks made from stone masonry and bricks/cement in Ethiopia cost in the range 113 - 219 Euro per m3 of storage including all costs, with costs varying with parameters such as trucked water for construction and solidity of construction (more solidly built tanks in clay areas cost more).
Other cost estimates
- Brick cement tank of 1 m3: 1 bag of cement, 100 bricks, 1 kg of wire US$ 20.
- Brick cement tank of 6 m3: 3 bags of cement, 300 bricks, 3 kg of wire US$ 40.
- Water jars from brick - US$78 per m3 storage (0.7 m3 for US$55).
- Thinner walled brick-cement tanks that are reinforced externally with steel wire every course of bricks can be cheaper and easier to construct than ferrocement tanks. Volumes can be up to 30m3 and the tank is rendered inside and outside. Cost: US$6.7 - $20 per m3 of storage (e.g. 1m3 for US$20; 6m3 for US$40).
- In Kenya, brick/cement tanks cost $37 per m of storage (21m3 tank cost $780).
- In Sri Lanka, brick tanks cost 28 per m3 of storage (5m3 tank cost $140).
Field experiences
Brick cement tanks have been constructed in Nicaragua and Ghana, among other countries.


