Difference between revisions of "Brick cement tank"
(→Acknowledgements) |
|||
| (38 intermediate revisions by 2 users not shown) | |||
| Line 1: | Line 1: | ||
| − | + | [[Image:Storage_tank_for_rooftop_harvesting_icon.png|right|80px]] | |
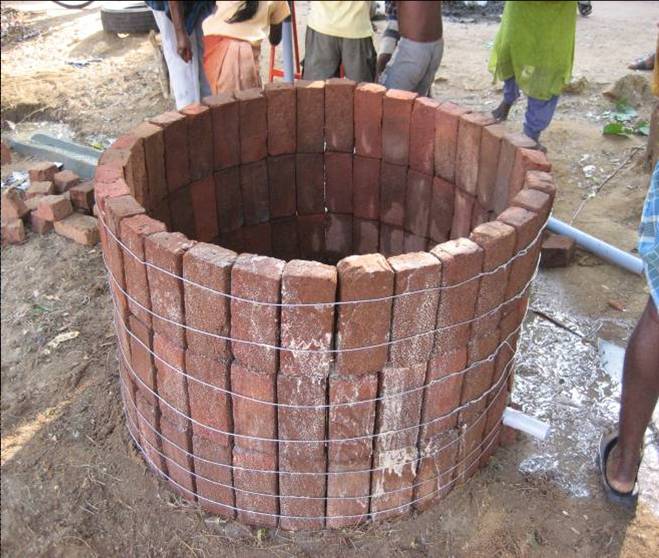
| − | [[Image:Storage_tank_for_rooftop_harvesting_icon.png|right]] | + | [[Image:brickcement.jpg|thumb|right|200px|A brick-cement tank before the application of the cement. Photo: Arrakis and Connect International - [http://www.arrakis.nl/reports/Manual_Fabricating_Brick_Cement_Tanks_short_03_lr.pdf Fabricating Brick Cement Tanks.]]] |
| − | [[Image:brickcement.jpg|thumb|right| | + | Brick cement tanks are a low cost option for storing water gained through water harvesting. They are cheaper than ferro-cement tanks and easier to build. In clay areas, be sure to build the tank robustly enough to resist cracking. Ground tanks should always be designed as either hemispherical (half ball shape) or cylindrical because those shapes equalize the pressure of water and soil whether the tanks are full or empty (square or rectangular tanks will always crack).<br> |
| − | Brick cement tanks are a low cost option for storing water gained through water harvesting. | + | Water extraction can be done using gravity, [[Handpumps]] or other pumps, or with a bucket. |
| − | ==Suitable conditions== | + | ===Suitable conditions=== |
| − | * The area should be suitable for [[rainwater harvesting]]. Volumes can be 0.5 to 30 m3. | + | * The area should be suitable for [[rooftop rainwater harvesting]]. Volumes can be 0.5 to 30 m3. |
| − | * Tanks should not be located near a pit latrine/toilet or rubbish or on an | + | * Tanks should not be located near a pit latrine/toilet or rubbish or on an ant hill. |
* Avoid building the tank next to a tree as the roots may undermine the foundation and dry leaves will block gutters. | * Avoid building the tank next to a tree as the roots may undermine the foundation and dry leaves will block gutters. | ||
* The height of the gutters should be higher than the proposed tank height. | * The height of the gutters should be higher than the proposed tank height. | ||
| + | * Do not site tanks where heavy vehicles will pass close to tank foundations. | ||
| − | |||
| − | |||
| − | |||
| − | |||
| − | ==Construction, operations and maintenance== | + | {| border="1" cellpadding="5" cellspacing="0" align="none" |
| − | [[Image:Brick cement tank.PNG|thumb|right| | + | |- |
| − | Materials consist of ( | + | ! width="50%" style="background:#efefef;" | Advantages |
| + | ! style="background:#f0f8ff;" | Disadvantages | ||
| + | |- | ||
| + | | valign="top" | - Cheaper and easier to build than ferro-cement tanks <br> | ||
| + | | valign="top" | - Clay areas require sturdier tanks (more costly) <br> | ||
| + | |} | ||
| + | |||
| + | <br> | ||
| + | ===Resilience to changes in the environment=== | ||
| + | ====Drought==== | ||
| + | |||
| + | '''Effects of drought''': Badly made concrete and cracked linings (e.g. in tanks, dams, waterways, wells, and other structures). <br> | ||
| + | '''Underlying causes of effects''': Less water used for curing; Impure water used for mixing. <br> | ||
| + | '''To increase resiliency of WASH system''': Ensure adequate mixing, ratios, purity of ingredients; Minimize water content in mixture; Ensure adequate curing. | ||
| + | |||
| + | For more information on drought: [[Resilient WASH systems in drought-prone areas]] | ||
| + | |||
| + | ===Construction, operations and maintenance=== | ||
| + | '''General advice on cement''': A common cause of cracks in structures and linings (e.g. in tanks, dams, waterways, and wells) is errors in mixing and applying the cement. First, it is important that only pure ingredients are used: clean water, clean sand, clean rocks. The materials have to be mixed very thoroughly. Second, the amount of water during mixing needs to minimal: the concrete or cement needs to be just workable (somewhat dry) and not fluid. Lastly, it is essential that during curing the cement or concrete is kept moist at all times, for at least a week. Structures should be covered with plastic, large leaves or other materials during the curing period, and kept wet regularly. | ||
| + | |||
| + | '''Specific advice''': | ||
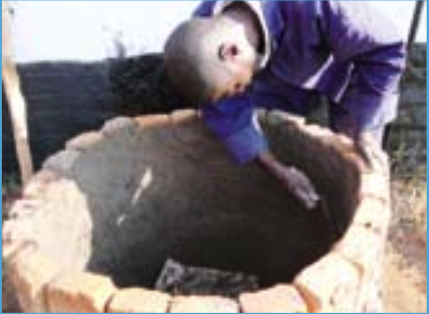
| + | [[Image:Brick cement tank.PNG|thumb|right|200px|Construction of a small brick cement tank, Mozambique. Materials consist of (locally produced) bricks (or blocks of hard rock), cement and steel wire. Approximately 1 bag of 50 kg cement per m3 tank volume. The bigger the volume of the tank, the lower the amount of materials (and thus costs) per m3 tank volume. Photo: Arrakis and Connect International - [http://www.arrakis.nl/reports/Manual_Fabricating_Brick_Cement_Tanks_short_03_lr.pdf Fabricating Brick Cement Tanks.]]] | ||
| − | Brick cement tanks are constructed by placing an upright ring of bricks in a circle, with 3 rings of steel wire tightened around them. If the tank diameter is bigger than 2 meters more rings are needed. A second, third and fourth ring of bricks are added and suitably tightened. Cement is then applied on the inside and outside of the brick walls and to cover the bottom. A metal or PVC outlet pipe can be installed at the bottom. Once the cement has been applied, the tank needs to be covered with paper or plastic and kept wet for 7 days to cure the cement. Another curing option is to fill it up after the second day of installation. | + | Brick cement tanks are constructed by placing an upright ring of bricks in a circle, with 3 rings of steel wire tightened around them. If the tank diameter is bigger than 2 meters, more rings are needed. A second, third and fourth ring of bricks are added and suitably tightened. Make sure the wrapping of the barbed wire, g 12.5, is tight around the outer side of the tank in a spiral spaced 5 cm at the lower half of the tank, where the greatest strength is needed, and 10 cm on the upper half. Cement is then applied on the inside and outside of the brick walls and to cover the bottom. A metal or PVC outlet pipe can be installed at the bottom. Once the cement has been applied, the tank needs to be covered with paper or plastic and kept wet for 7 days to cure the cement. Another curing option is to fill it up with water after the second day of installation. |
====Maintenance==== | ====Maintenance==== | ||
| − | * Basic water quality testing is recommended during the first year | + | * Basic water quality testing is recommended during the first year with further testing when water quality is in doubt. Eg. the 'HACH' pillo test, costing about US$ 1 per test. Treatment to manage microbiological quality is also recommended. |
* Removal of debris and overhanging vegetation from gutters and the roof (preventing stagnation of water in the gutters) is required. | * Removal of debris and overhanging vegetation from gutters and the roof (preventing stagnation of water in the gutters) is required. | ||
* Physical inspection and repairing cracks with cement is also needed. | * Physical inspection and repairing cracks with cement is also needed. | ||
| − | ==Costs== | + | ===Costs=== |
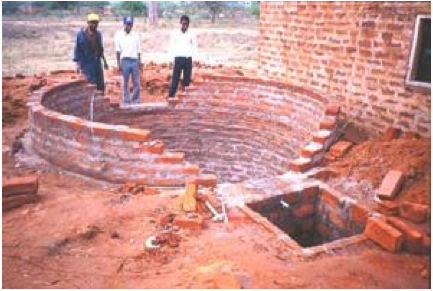
| − | The cost of underground tanks can be high and variable in cost per m3 of storage ( | + | [[Image:BrickTank.jpg|thumb|right|200px|This hemispherical tank built of burnt bricks reinforced with barbed wire and chicken mesh is for roof catchment of domestic water. [http://www.infonet-biovision.org/default/ct/180/soilConservation Infonet-biovison: Water storage.]]] |
| + | The cost of underground tanks can be high and variable in cost per m3 of storage (average around US$30-40 per m3 of storage), sometimes a lot more depending on various factors. | ||
* Sub-surface hemispherical tanks made from stone masonry and bricks/cement in Ethiopia cost in the range 113 - 219 Euro per m3 of storage including all costs, with costs varying with parameters such as trucked water for construction and solidity of construction (more solidly built tanks in clay areas cost more). | * Sub-surface hemispherical tanks made from stone masonry and bricks/cement in Ethiopia cost in the range 113 - 219 Euro per m3 of storage including all costs, with costs varying with parameters such as trucked water for construction and solidity of construction (more solidly built tanks in clay areas cost more). | ||
| Line 35: | Line 54: | ||
* Brick cement tank of 6 m3: 3 bags of cement, 300 bricks, 3 kg of wire US$ 40. | * Brick cement tank of 6 m3: 3 bags of cement, 300 bricks, 3 kg of wire US$ 40. | ||
* Water jars from brick - US$78 per m3 storage (0.7 m3 for US$55). | * Water jars from brick - US$78 per m3 storage (0.7 m3 for US$55). | ||
| − | * Thinner walled brick-cement tanks that are reinforced externally with steel wire | + | * Thinner walled brick-cement tanks that are reinforced externally with steel wire can be cheaper and easier to construct than ferrocement tanks. Volumes can be up to 30m3 and the tank is rendered inside and outside. Cost: US$6.7 - $20 per m3 of storage (e.g. 1m3 for US$20; 6m3 for US$40). |
| − | * In Kenya, brick/cement tanks cost $37 per | + | * In Kenya, brick/cement tanks cost $37 per m3 of storage (21m3 tank cost $780). |
* In Sri Lanka, brick tanks cost 28 per m3 of storage (5m3 tank cost $140). | * In Sri Lanka, brick tanks cost 28 per m3 of storage (5m3 tank cost $140). | ||
| − | ==Field experiences== | + | ===Field experiences=== |
| − | Brick cement tanks have been constructed in Nicaragua and Ghana, among other countries. | + | {{#ev:youtube|KinpClgH-IE|200|right|How to build a big tank}} |
| + | * Brick cement tanks have been constructed in Nicaragua and Ghana, among other countries. | ||
| + | * [http://en.howtopedia.org/wiki/How_to_Build_an_Underground_Brick_Dome_Water_Tank How to Build an Underground Brick Dome Water Tank.] Case study in Sri Lanka. | ||
| − | == | + | ===Manuals, videos and links=== |
| − | * | + | * [http://www.paceproject.net/UserFiles/File/Water/Brick%20tanks%20for%20storage.pdf Brick tanks for rainwater storage]. Action Sheet 22. PACE. |
| − | + | * [http://www.arrakis.nl/reports/Manual_Fabricating_Brick_Cement_Tanks_short_03_lr.pdf Draft Short Manual On Fabricating Brick Cement Tanks]. Arrakis & Connect International, 2006. | |
| + | * [http://www.infonet-biovision.org/default/ct/180/soilConservation Water Storage]. Infonet-biovision. | ||
| − | ==Acknowledgements== | + | ===Acknowledgements=== |
| − | * CARE Nederland, | + | * CARE Nederland, Desk Study: [[Resilient WASH systems in drought-prone areas]]. October 2010. |
| − | * [http://www | + | * [http://www.paceproject.net/UserFiles/File/Water/Brick%20tanks%20for%20storage.pdf Brick tanks for rainwater storage]. Action Sheet 22. PACE and SEARNET Rainwater Harvesting Technologies. |
Latest revision as of 00:26, 21 June 2017

Brick cement tanks are a low cost option for storing water gained through water harvesting. They are cheaper than ferro-cement tanks and easier to build. In clay areas, be sure to build the tank robustly enough to resist cracking. Ground tanks should always be designed as either hemispherical (half ball shape) or cylindrical because those shapes equalize the pressure of water and soil whether the tanks are full or empty (square or rectangular tanks will always crack).
Water extraction can be done using gravity, Handpumps or other pumps, or with a bucket.
Contents
Suitable conditions
- The area should be suitable for rooftop rainwater harvesting. Volumes can be 0.5 to 30 m3.
- Tanks should not be located near a pit latrine/toilet or rubbish or on an ant hill.
- Avoid building the tank next to a tree as the roots may undermine the foundation and dry leaves will block gutters.
- The height of the gutters should be higher than the proposed tank height.
- Do not site tanks where heavy vehicles will pass close to tank foundations.
| Advantages | Disadvantages |
|---|---|
| - Cheaper and easier to build than ferro-cement tanks |
- Clay areas require sturdier tanks (more costly) |
Resilience to changes in the environment
Drought
Effects of drought: Badly made concrete and cracked linings (e.g. in tanks, dams, waterways, wells, and other structures).
Underlying causes of effects: Less water used for curing; Impure water used for mixing.
To increase resiliency of WASH system: Ensure adequate mixing, ratios, purity of ingredients; Minimize water content in mixture; Ensure adequate curing.
For more information on drought: Resilient WASH systems in drought-prone areas
Construction, operations and maintenance
General advice on cement: A common cause of cracks in structures and linings (e.g. in tanks, dams, waterways, and wells) is errors in mixing and applying the cement. First, it is important that only pure ingredients are used: clean water, clean sand, clean rocks. The materials have to be mixed very thoroughly. Second, the amount of water during mixing needs to minimal: the concrete or cement needs to be just workable (somewhat dry) and not fluid. Lastly, it is essential that during curing the cement or concrete is kept moist at all times, for at least a week. Structures should be covered with plastic, large leaves or other materials during the curing period, and kept wet regularly.
Specific advice:

Brick cement tanks are constructed by placing an upright ring of bricks in a circle, with 3 rings of steel wire tightened around them. If the tank diameter is bigger than 2 meters, more rings are needed. A second, third and fourth ring of bricks are added and suitably tightened. Make sure the wrapping of the barbed wire, g 12.5, is tight around the outer side of the tank in a spiral spaced 5 cm at the lower half of the tank, where the greatest strength is needed, and 10 cm on the upper half. Cement is then applied on the inside and outside of the brick walls and to cover the bottom. A metal or PVC outlet pipe can be installed at the bottom. Once the cement has been applied, the tank needs to be covered with paper or plastic and kept wet for 7 days to cure the cement. Another curing option is to fill it up with water after the second day of installation.
Maintenance
- Basic water quality testing is recommended during the first year with further testing when water quality is in doubt. Eg. the 'HACH' pillo test, costing about US$ 1 per test. Treatment to manage microbiological quality is also recommended.
- Removal of debris and overhanging vegetation from gutters and the roof (preventing stagnation of water in the gutters) is required.
- Physical inspection and repairing cracks with cement is also needed.
Costs

The cost of underground tanks can be high and variable in cost per m3 of storage (average around US$30-40 per m3 of storage), sometimes a lot more depending on various factors.
- Sub-surface hemispherical tanks made from stone masonry and bricks/cement in Ethiopia cost in the range 113 - 219 Euro per m3 of storage including all costs, with costs varying with parameters such as trucked water for construction and solidity of construction (more solidly built tanks in clay areas cost more).
Other cost estimates
- Brick cement tank of 1 m3: 1 bag of cement, 100 bricks, 1 kg of wire US$ 20.
- Brick cement tank of 6 m3: 3 bags of cement, 300 bricks, 3 kg of wire US$ 40.
- Water jars from brick - US$78 per m3 storage (0.7 m3 for US$55).
- Thinner walled brick-cement tanks that are reinforced externally with steel wire can be cheaper and easier to construct than ferrocement tanks. Volumes can be up to 30m3 and the tank is rendered inside and outside. Cost: US$6.7 - $20 per m3 of storage (e.g. 1m3 for US$20; 6m3 for US$40).
- In Kenya, brick/cement tanks cost $37 per m3 of storage (21m3 tank cost $780).
- In Sri Lanka, brick tanks cost 28 per m3 of storage (5m3 tank cost $140).
Field experiences
- Brick cement tanks have been constructed in Nicaragua and Ghana, among other countries.
- How to Build an Underground Brick Dome Water Tank. Case study in Sri Lanka.
Manuals, videos and links
- Brick tanks for rainwater storage. Action Sheet 22. PACE.
- Draft Short Manual On Fabricating Brick Cement Tanks. Arrakis & Connect International, 2006.
- Water Storage. Infonet-biovision.
Acknowledgements
- CARE Nederland, Desk Study: Resilient WASH systems in drought-prone areas. October 2010.
- Brick tanks for rainwater storage. Action Sheet 22. PACE and SEARNET Rainwater Harvesting Technologies.
